User guide
General Concepts
Our main objective in the CyberOffice addon system is to move manual modes of communication with customers to automation via email, SMS, web interfaces, and automated calling. It is to save time, enhance efficiency and convenience, and wow your customers with how modern your company is.
Outline of Scenarios
Before the job
- Initial booking: customer schedules initial fresh job via online scheduler
- Invite to schedule: initial scheduling on an existing order -- where the order is received from a third-party, such as a home warranty company, landlord/tenant situation, or on an existing order after parts arrive (ServiceDesk emails the consumer with a request to schedule via a "click here" hyperlink leading to online scheduler)
- Appointment confirmation: Reminding/Confirming on tomorrow's appointments (ServiceDesk emails, SMS's, or phone calls customers, reminding them of the appointment, providing the tech's ETA, and providing a "click here" hyperlink, this one allowing them either to confirm or to reschedule if required)
During the job
- Job status tracking: customers can go online to see the status of their jobs
- Technician tracking: a variation of “tracking a shipment,” our version allows the consumer to see when the tech left the office, how many jobs are on his roster, where the consumer fits on his list, and where he is on his way working through it
After the job (post completion)
- Online surveys / Positive review generation: (requires use of SD-Mobile) when job is done, customer receives an email with link asking him/her to complete a truly short, 30-second, 4-questions-only survey; employs the “net-promoter-score” methodology
- Post job robocall: after the job is done, a call goes to the customer with a tailored message
Setting it up
There are a few elements to the CyberOffice suite that make the magic happen.
CyberLink: This is a utility similar to SD-MobileLink that manages sending a recieving information between ServiceDesk and online services such as online booking. There's also some settings for CyberOffice located in this app (other settings, such as online scheduler customization are found at my.rossware.com). If someone books a job online, this utility is what gets that job into ServiceDesk. You can download it here.
auto start or else!For obvious reasons, it’s important for that utility to run 24/7. Please be sure to follow the advice (as provided in your introductory email) to setup Windows so it will auto-start CyberLink (at the computer where you’ve determined to run it) when Windows itself boots.
Your own website (optional): These days almost every company has a website. We highly recommend you get one if you don't. Most companies elect to embed the online scheduler in their website for a custom look. If you don't have a website and want a cheap one to get started with click here. However, this is optional as you may simply have invite links go directly to the scheduler without having it embedded.
Embedding online scheduler<iframe src="https://booking.rossware.com/schedule/0777" id="cyberOfficeFrame" style="width:100%;height:500px;border:none;" />OR
Link to external site<a href="https://booking.rossware.com/schedule/0777" />ServiceDesk's ZoneScheduler: This is the basis for SD-CyberOffice to know your availability by zone.
Types, Makes, and Dealers lists: This is the basis for the online scheduler's dropdown lists
Communication channels: The services that allow CyberLink to send and recieve customer communcations
ZoneScheduler
CyberLink uses the data from the ZoneScheduler to determine your availability status for presenting live availability to your customers scheduling online. If you’ve previously setup for reception of automated dispatches via ServiceBench, ServicePower, Samsung or LG (using any of the applicable DispatchLink utilities), it follows you already know about (and have implemented) the ZoneScheduler system within ServiceDesk. In such a case, there is likely no need to read further in this section.
If you setup the ZoneScheduler with just one zone, it allows you to forego creation of a ZoneList.txt file (the “no-ZoneList-file,-default-zone-only” mode). CyberOffice cannot directly rely on this mode, because it needs an actual list of zips.
If you want to stick with that mode (whether already setup that way for other purposes, or setting up presently), you can satisfy CyberLink’s need for a list of zips by making a different file.
Please make and save to your server’s \sd\netdata folder a file called ZipsForCyber.txt. For contents, simply place in the file one line of text for each zip you want to offer for service within CyberOffice. Each such line should consist simply of said zip, and nothing else.
If you have not already set up the ZoneScheduler system, it’s time to do so now. There are instructions in ZoneSchedulerInstructions.pdf, and can be found in the c:\sd folder at any station where ServiceDesk has been installed.
The basic concept is to provide a venue in which you can indicate what your job capacity is for given days. Based on this, programs such as those DispatchLink utilities and CyberLink can make a comparison, for any given day, between programmed capacity and what’s actually scheduled—in order to determine if vacancies remain.
An added twist is that, if beneficial to overall strategy, you are permitted to divide your territory into as many “zones” as wanted, each being defined via a list of zipcodes. This is particularly helpful if there are areas you wish to service only on particular days of the week (in which case you could make their allocations zero on other days), or if your territory is so large that it’s impractical, say, to have techs that normally work in one region cross-over and help out in another region on days when their area is light and the other heavy.
Types, Makes and Dealers Lists
For customers scheduling online, they must input the type of machine being serviced, the make, and the dealer purchased from. This information is uploaded to our servers by CyberLink with the button labeled ‘Upload Core Values.’ That button’s function is to upload, to the remote server, several details about your company, including the zipcodes you service. Importantly, it also uploads from the ServiceDesk UnitInfo system its lists of machine Types, Makes and Selling Dealers.
Given that such lists will be presented to your online customers, it’s a good idea to make sure you’ve got them cleaned up and optimized, within ServiceDesk, so your customers will see exactly what you want them to see.
And then there’s option 2.
We’ve ran into a couple of users who wanted to maintain very extensive lists within ServiceDesk, while presenting more limited lists to the online customer. If you’d like to do this, simply make a new copy of the UnitInfo.mdb file (as found in the \sd\netdata folder on your server). Name this new file UnitInfo-ForWeb.mdb, and place it in the very same folder. Open this new file in Microsoft Access, remove all the tables except the three of concern (DealerList, MakesList and TypesList). Then edit the lists to preference.
If you don’t possess Microsoft’s Access program, there’s an easy workaround. When you make that copy of the existing UnitInfo.mdb file, save it (and this is prior to re-naming it) to the \sd\netdata folder at a station in your network (but not the server itself) that’s operating in Thick-Client mode (i.e., it has its own set of \sd folders). Then, at that station and from within ServiceDesk’s Settings form, momentarily set it to use its own c:\ drive as the server. At this point, ServiceDesk (at such station) should be using other than its normal operating files (i.e., what you’ve placed into its local c:\sd\netdata folder, including your to-be-edited copy of the UnitInfo.mdb file). From this instance of ServiceDesk, go into the UnitInfo form and use its mechanisms to edit the lists as desired for website presentation. Don’t worry about otherwise messing up your UnitInfo data here, for this is only a copy you’re working with. After you’ve edited the lists as desired, re-set ServiceDesk to use the proper/intended drive as server (i.e., so you’re back to the proper operational setup, looking at real operating data). Now, go to the copy you made and edited (i.e., via ServiceDesk in temporary/not-true-server mode). Re-name it (per above instructions), then copy it into your true server’s \sd\netdata folder (note that you’re not replacing the operating file; you’re simply moving in a new one under different name).
If you don’t have any stations operating in Thick-Client mode (i.e., all are setup as Thin), another workaround (this would need to be done during non-business hours, when others -- including techs in the field via SD-Mobile -- are not otherwise accessing the data) would be to make a copy of UnitInfo.mdb that’s intended as your “this-is-my-real-copy-for-true-operation” instance. Save it elsewhere (i.e., a place that’s safe from editing, outside the \sd\netdata folder). Then use the UnitInfo form from within ServiceDesk to edit the lists as wanted for web-presentation purposes (again, don’t worry about what you’re otherwise doing to the data). After you’ve finished, go into your server’s \sd\netdata folder and do the above-specified re-naming on what was formerly the operating UnitInfo.mdb file. Then, go back to the copy your made at the beginning (i.e., your “this-was-my-real-copy-for-operation” instance) and copy it back into your server’s \sd\netdata folder.
You are, in short, doing a simple dosie-doe, and it’s easy if you simply think it through. Be sure if using the second method, though, that you don’t fail to copy your operating copy of the file back into the server’s \sd\netdata folder.
That last step is critical!
Setting up communication channels
According to your preference, needs, and circumstances, ServiceDesk, SD-CyberLink and SD-MobileLink may all be involved in sending communications to your customers on your behalf. These communications may be via email, SMS-text-messaging and/or robo-call. Those applications must all be equipped to participate in any such sending as may wish to do.
In regard to emailing, each of involved applications has an Email setup window where you must do the email setup for the application involved (the window for ServiceDesk is accessed under "File Functions" in the MainMenu; SD-CyberLink and SD-MobileLink have access buttons right on their respective application faces. Beyond that, here is a document that provides background information and specific considerations regarding email setup (you may access the same document via a button that's in each email setup window itself).
Please bear in mind that settings for the email setup are particular to each application and to each user login.
In regard to text-messaging and robo-calling, those require that you use particular setup elements that are provided in your dashboard. Once you have setup for robo-calling there, you are automatically also setup for text-messaging.
For customers who schedule online, this happens by default. But if you ever schedule a customer over the phone make sure to be diligent in always collecting an email address.
Basic instructions for each scenario
Initial Booking of Service
Add a button or link to schedule service with you online. This button or link can be on your website or social media sites linking to embedded on your own website or non-embedded online scheduler if you have no website.
Configure the station where CyberLink is running for successful emailing.
you must have cyberlink setupWe already discussed email setup (just a little ways above). We just want to emphasize that even if you chose to only using this online-booking aspect of CyberOffice, you need to have SD-Cyberlink setup for successful emailing. The reason is because the online booking interface promises your customer that a confirmation of the booking will be promptly emailed. It's SD-Cyberlink that does this, and of course it can't do it if its emailing ability is not setup.
With each of the above elements setup (and CyberLink properly configured, running, and with its "Core Data" having been uploaded), you're now ready to begin seeing new, scheduled service requests pop right into ServiceDesk without any office personnel spending time speaking with your customer.
Test it! If you want to pretend you're a customer booking a repair with this system and on your own website as setup, it's a very good idea. Book the job with the customer name as "TEST" and our system will automatically recognize it as a test job and not bill you for it.
Invite to schedule on existing order
Email-Link-Initiated Scheduling of First Appointment After Separate Service Request
Suppose a property management company calls, seeking service at one of their rentals. Or perhaps it’s a home warranty company seeking service for a policy holder. Regardless, they provide all the order information, and you now need to contact the ultimate consumer, for scheduling.
When you do a Job/Sale transition from the Callsheet go to the resulting JobRecord, and there invoke the process to email or SMS text-message a scheduling request to the consumer (an email or textable number is required).
You can initiate this either by right clicking on the Scheduling button or Ctrl-S on your keyboard while in the appropriate JobRecord. You may choose to email or SMS your customer a hyperlink that will allow them to schedule a service as attached to that JobRecord.
Once the customer clicks the link and schedules the service, the information will of course automatically be put in place in ServiceDesk.
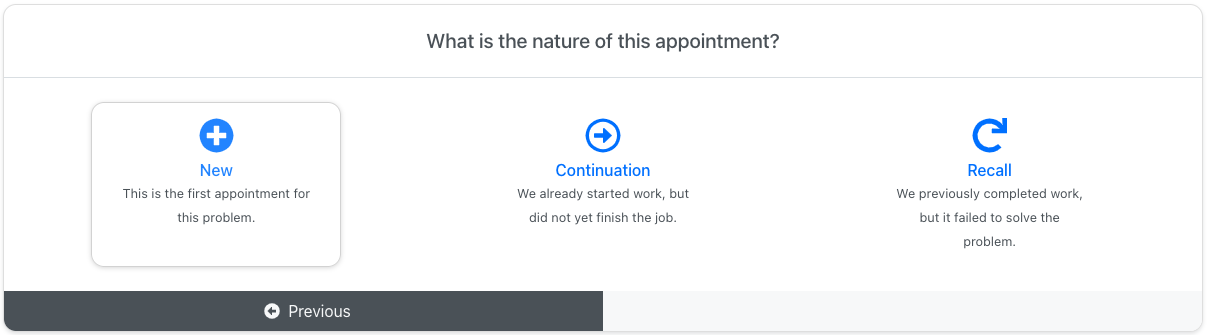
Email-Link-Initiated Scheduling of New Appointment after Parts Arrive
This is much like the previous scenario, except the intent is for use on jobs where the tech has already been there, ordered parts, the parts have arrived, and re-scheduling is now needed.
These communications can be invoked from either of two contexts:
When you check-in the last of any/all parts as ordered on a job, ServiceDesk will automatically ask if you want it to email the Request
You can manually initiate the request, from the JobRecord, using exactly the same method as described for the previous email/SMS scemarop (i.e., from the JobRecord, either right-click on the Scheduling button or hit
Ctrl-Son your keyboard). In this last context, ServiceDesk detects (based on information in the JobHistory) that this is a parts related scenario and behaves accordingly.
Confirming Appointments
The notion here is, sometime in the afternoon or evening of each day, you’ve worked out the assignments and sequence of jobs for tomorrow’s work (if you’re not using the auto-time-frame-estimator for this purpose, we highly recommend it). Now you need to: remind your customers of their appointments; inform them of the time frame within which you’re expecting the tech to arrive; and confirm they’ll actually be there.
Obviously, if done via manual means, the above is a very time-consuming and laborious task.
What this features accomplishes is, at your request (or it can even be set to happen automatically, as a backup), ServiceDesk will itself send a communication to each of those customers reminding of the next day's appointment, informing of the time-frame, and asking for confirmation that each each such customer will be there and ready to receive your technician.
If the communication is via email or text-message, it will include a hyperlink on which your customer is asked to click, which then opens an online interface via which confirmation (or cancellation, if necessary) may be indicated.
If the communication is via robo-call, the customer is directed to "Press 1 to confirm," "Press 2 to cancel," etc.
The customer's response will be automatically brought back into ServiceDesk and be viewable in any appropriate venue. There is even a little snippet added into the narrative JobHistory describing the confirmation.
You will want to do some setting up in ServiceDesk on this feature. We have a document that is specifically about that. Advanced elements of setup in ServiceDesk for Appointment-Reminder/Confirmation-Requests
Job-Status Checking
The idea here is, when the tech has already had his visit on a job and could not then complete it (likely because parts had to be ordered), and when the customer finds herself wondering (perhaps a few days later) what's happening on the job, there is no need for her to call your office so as to inquire. Instead, she can go to a nice online interface and see exactly what's happening.
There are two paths by which your customer may, potentially, get to that online interface.
After the technician has completed any visit (and where the job still not complete), SD-MobileLink can send a communication to the customer informing of the availability of this status-checking resource, and with a hyperlink that will take here right there, with her own job already selected and shown. To enable this sending, you just need to activate a particular checkbox in SD-MobileLink:
The second path is you may provide one or more buttons on your website, on which your customer is invited to click, so as to check on job status. To get the url that needs to underlie such buttons, go to your my.rossware.com interface.
Regardless of which paths you provide your customer, it's essential to this feature that needed data is provided online. To enable this, it's essentialy that you have this box checked in the SD-CyberLink program:
You'll notice (if looking above) there are some other checkboxes associated with Job-Status Checking. If you float pointer over those while in the actual application, ToolTips will display with brief explanation. We do want to make a point here. It is that we very highly suggest that you expose to your customer the "whole history" (this refers to the JobRecord's narrative history) your your customer.
To be sure, many service companies object to this concept, fearful that embarrassing stuff might have gotten into such narratives. There's a simple solution: assure you're diligent on every job, that that embarrassing stuff is never added into these narratives. When you customer is allowed to see each dutiful step you are doing on her job to bring it to completion, it can mean a lot.
Technician Tracking
Setup for this scenario closely parallels what’s done for Scenario 5. In fact, it parallels so closely you may use the same instructions as found in the 2nd through 8th paragraphs of the preceding section, and simply adapt, as obviously applicable, for this scenario.
Where a substantive difference arises between is in the method used to provide your customer with an email hyperlink that enables "hot-visits" to the web page in question (here, it’s your tech-tracking page, as opposed to your job-status-checking page) — in particular, in providing an email that gives your customer a hyperlink to open the page as for a particular job, as opposed to merely having "cold-link" buttons provided on your website.
You may recall from the prior section that we are presently configured to have the program optionally send emails after any visit where the tech did not finish. These emails express regret the job was not completed, and provide a link the customer may click on to monitor the job’s progress (i.e., Job-Status Checking).
The parallel for that here is simply in a different place and operation. Specifically, it’s provided via the utility itself (i.e., is not "farmed out" to MobileLink), and, instead of being paired to the tech’s non-completion after a visit, it’s paired to the Scenario 4 Confirmation process.
Specifically, after ServiceDesk emails the customer to request confirmation of a next-day’s appointment, and after the customer then proceeds to your website’s online interface to make that confirmation, the CyberLink program immediately follows with an email that says, essentially, "Hey, thanks for the confirmation, and... incidentally.... if tomorrow you happen to be wondering how your tech is running, click this link."
Presently, the CyberLink program will do this automatically any time it downloads an email-triggered appointment confirmation — assuming, at least, you’ve otherwise set it up to accommodate technician tracking. In other words, we have not presently given you an option to NOT have such emails sent, you’re otherwise using the online confirmation feature, and you’ve otherwise setup your system to offer technician tracking. If you happen to an "off" feature for this, you’ll have to let us know.
Surveys / Positive review generation
This system allows your customers to take very simply surveys that do not burden them, while providing you with very valuable performance metrics. Furthermore, if the review is deemed very positive by our systems, the customer will be invited to review you publicly on any major review platform of your choice.
To implement the survey system is simplicity itself. Simple “turn it on” via a provided checkbox in the SD-CyberLink interface:
With the box checked, as SD-MobileLink program downloads any PVR on which the job is complete, it will email the customer a their invoice prefaced with the short survey.
Your customer completes the survey and the information auto-compiles for you. To review and analyze results, just login to your dashboard, and pick Survey System from the menu. You’ll then see a series of pages where you can look at individual surveys (along with customer comments), overall statistics, and metrics as applicable to each of your personnel (the system knows behind-the-scenes who took each call, which tech did the work, and so on). There’s even a page to compare your company’s score with the average of companies using the system, and to customize text as presented to your customer.
Another feature (in particular, on the Customize page) allows you to set a "Low Scores" threshold. The simple idea is you may want to receive a direct alert (via email or SD-Mail) any time a customer is significantly unhappy. This allows you to proactively contact the customer and seek to turn their feeling around (you can imagine just the fact that you care enough to make the effort is likely to have a large effect on customer feelings). Besides setting the "Low Score" threshold at which these alerts are triggered, you may also designate the particular email to which they are sent.
Using this added mechanism is totally optional, so far as your use of the system is concerned. We believe, however, your use of this option can serve to dramatically increase the quantity of positive reviews that are posted for you. That, in turn, should serve to dramatically drive new COD business in your direction.
Automatic “Tech-Is-On-His/Her-Way”
Much like the Survey option, this is another that pre-supposes you’re using SD-Mobile (it would hardly be applicable if you were not). To setup (and assuming you’ve first done the RoboCalling base-setup via ), simply check the enabling box within your SD-CyberLink interface:
With that done, it will cause your techs in SD-Mobile to encounter a new experience. As they finish one job (and assuming it’s not the last in their day’s lineup), they’ll get a prompt something like this:
All it takes is your tech’s simple consent for the RoboCall to go forward to the customer (or a tiny bit of quick user interaction to provide an other-than-standard “I’m on my way”). People love this. We are planning to add an email-customer-tech-is-on-his-way option (and configure the email to include the tech’s picture), but this is one we’ve not gotten to yet.
Post-completion messages
The idea here is you may want some kind of telephone call to go to your customers when the job is completed. Though you could make any kind of message as wanted, the users that particularly wanted this were envisioning something like this:
"This is a message from XYZ Appliance Service, and we want to thank you for granting us the privilege to service your machine. We hope everything went superbly, and, if not, that you will please let us know so we can amend. Please also know that in the next two or three weeks you will be contacted by Whirlpool to fulfill a survey on their behalf. We hope you can view us favorably at that time."
Given this basic concept, we realized folks wanting post-completion RoboCalls might want different scripts employed for different contexts (and might also prefer different timing in regard to when the calls go out). Given this, we’ve setup to allow such variation. Specifically, there’s a dedicated section within the SD-CyberLink interface, as follows:
Focusing first on the bottom-half of this section (under the heading ”calls to go out:”), the general idea is you may choose for these RoboCalls to be made within a few minutes of the tech leaving the home (with his repair completed); or that evening (at an approximate time you specify); or the next day (again, at an approximate time you specify). It's that simple.
We'll now move to examination of controls in the top-half of this section (those under the heading "use script type:"). Again, it's simple. If you want post-completion RoboCalls going out on your COD jobs, simply set the script number you want used for that context (otherwise leave blank in lieu of the number, and no calls such calls will go out on this variety of job). Ditto for calls as made to the consumer where the job involves a third-party-payer other than those for which you specifically designated a particular script.
Regarding that last sentence, you may notice it implies you can designate particular scripts for use with specific third-party payers (or, more properly, for use with the consumers associated with them). But, you may notice, there is no place in the above-shown section of controls for such specific-to-particular-payer script settings. That's because, if you want to pick a script for use in conjunction with any particular third-party payer, it's done from within ServiceDesk itself. Specifically, there is a setting for this purpose in the QuickEntryTemplate form, as applicable to any such payer:
The idea is simple. If you want a particular post-completion RoboCall script used in conjunction with consumers associated with a particular third-party-payer client, simply designate the script number, in that client's QuickEntryTemplate. Okay, but what about all this regarding scripts and script numbers? Where do you get or make those?
This is another function to perform via your my.rossware.com interface. There is an interface there (under menu-selection “RoboCalling”) via which you can create and manage up to five separate post-completion scripts, each identified via sequential number.
Setup your scripts (or just a single one if that’s all you want), and set to use those you want in the contexts you want. That’s all there is to it.
Enhancements, customizations and other implementation
If you have read and implemented the descriptions as provided above, you should now be setup for basic and effective CyberOffice implementation. Regardless, things can always be made even better, and that is what this section is primarily about.
Customizing consumer facing text
In several contexts, CyberOffice presents the consumer with communicative email text: sentences and paragraphs hat are designed to convey important elements of meaning. In some cases, communication may be via RoboCall and/or SMS Text-Messaging instead. Regardless of context, we’ve done our best to pre-“can” any such language as is involved, so as to make it optimum for wide acceptance and maximum clarity.
However, we recognize you may want to have text presented differently. Thus, we’ve configured a mechanism via which to allow customization. We have a separate document that details precisely how to do it. To view that document, click here.
Adding Tech-Pictures to confirmation emails/SMS texts
This enhancement many customers love: having a picture of the technician before he/she arrives. It adds a safety element: they can look past their door and be confident it’s really your tech, before opening, because they've already seen a picture of them. It also adds nicely to the aura of professionalism surrounding your company.
To setup for inclusion of tech pictures is very simple. You upload the pictures online in your dashboard under SD-Mobile > Tech images.
In regard to each tech picture, there are some caveats.
- Image Size: Tech pictures will display within the email at a size of 240 x 360 pixels. You will have best results if providing pictures in exactly that size. (If your provided picture has less resolution, it is likely to look blurry in the email; if more, the greater resolution will be wasted; if your ratio of width-to-height is different, there will be proportional distortion.)
- Image Format: Each picture must be in jpeg format (i.e., with a “.jpg” extension).
- Image FileName: Each filename must consist of your company’s CyberOffice UserID, then a hyphen, then the two-letter code as applicable to the tech whose picture it is. As an example, at Rossware our test account UserID is 1001, and my own two-letter tech code is “GR”. Thus, a FileName for my image and as connected to the Rossware’s test account must be named "1001-GR.jpg".
- Image FileSize: Each image file should not consume more than 50 kilobytes. For so small an image, it will in all likelihood consume less.
- Image Placement: Each image file must be placed in a particular location on the Rossware server. You needn’t worry what this location is. Just use your my.rossware.com login, where an interface is provided (just use the menu there) whereby you can upload files to this location, and/or delete or replace as wanted. That’s really all you need to know about setup. Rossware machinery takes care of the rest.
When ServiceDesk is creating a confirmation email, and when it finds a picture exists for the assigned tech, it inserts that picture within the email just after the email’s reference to the tech’s name (inserting a double-line space both before and after the picture).
Suggestions for Enhanced Marketing
To the consumer, scheduling online can be a huge convenience and attraction. For that reason, we suggest promoting the concept broadly. Advertise the ability (with appropriate url) on your business cards and invoices, in your yellow pages ads, on stickers that are attached to the machine that’s been repaired, on promo magnets, and so on.
On your website directly, we suggest making the ability to directly book. It’s a big sales feature, after all.
We also suggest modifying your recorded voice greetings to inform consumers that instead of waiting for your return call or in the queue, they can go online to schedule their repair. No doubt, a good many consumers will say “Yea, that’s even better.” They’ll hang up and do it post haste—thus assuring you actually get the job (i.e., they won’t call someone else after losing patience when waiting to communicate with you). Plus, your queue will be trimmed for others.
You might also train your techs to casually ask the consumer, as they’re engaged in conversation, if the job was booked online. If the answer is no, that will lead (quite naturally) to discussion of the fact that it was an option.
All of this should further distinguish you, and give you a significant edge over the competition.
Other Surprising Uses
We've recently learned of clients employing call takers that handle incoming calls from their homes or remote offices. Instead of bothering to network them into their office, they simply have them go online to their scheduling page and book calls in that manner.
It’s possible you could have a commercial answering service book calls similarly. We’re not sure of all the potential variations, but we’re betting that, with the imagination of all you clever folks out there, we’ll hear of still more cool ideas. Please let us know.