Using the SD Backup utility on a server
Using a flash (thumb) drive, or external hard drive:
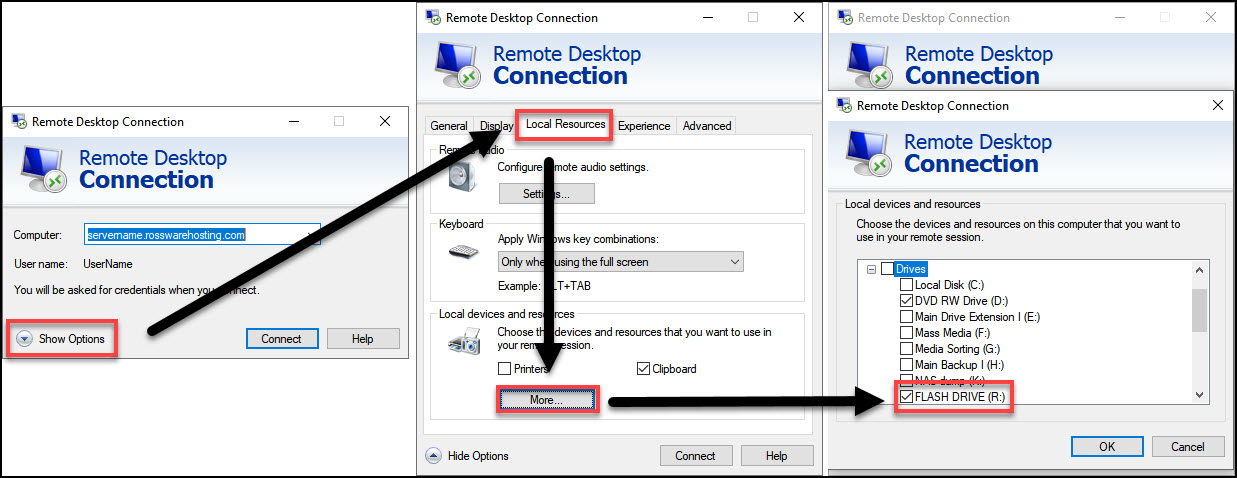
After you have plugged in the flash drive or external hard drive into your local computer, we will need to make it accessible to the RSS server. After opening the Remote Desktop Connection program, and before connecting, click on Show Options (bottom left). Then click on the Local Resources tab, then the More… button under Local devices and resources. When the Local devices and resources window opens, select the proper flash drive or external hard drive.
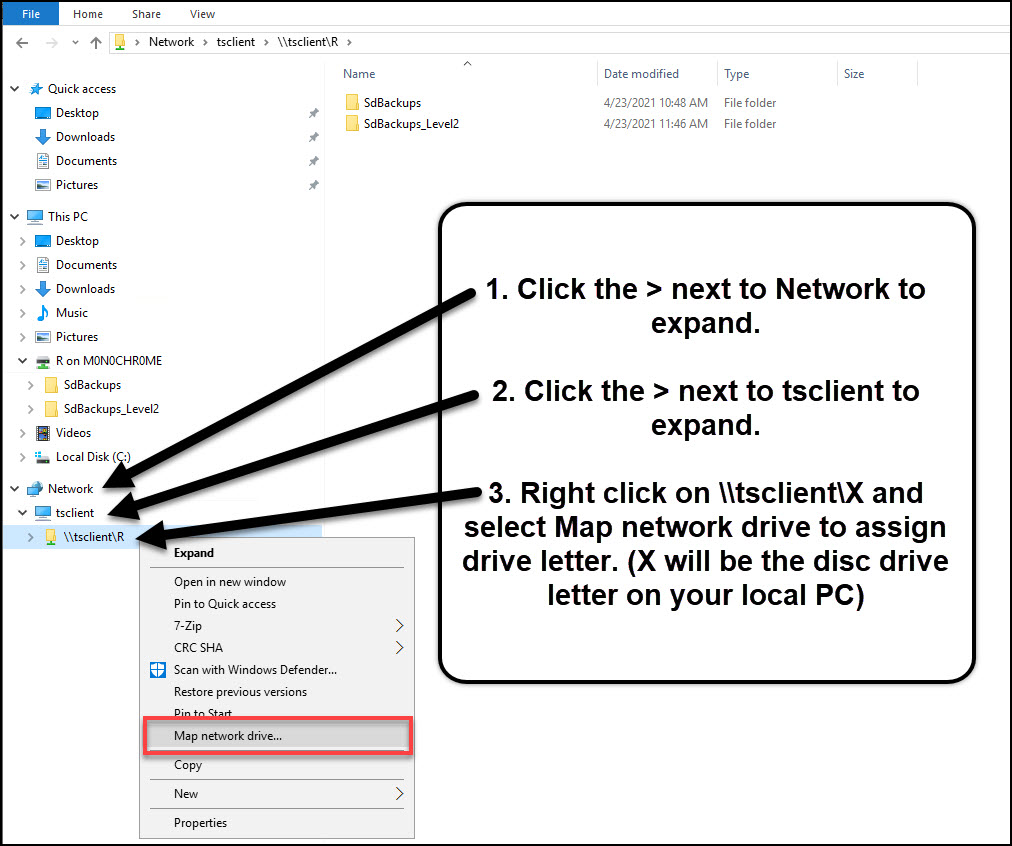
Now when we connect to the RSS server, the flash drive or external hard drive will be present, but it will be lacking a local drive letter that is needed by the Rossware backup utility. To assign it a drive letter first open File Explorer. Once File Explorer is open, click on the > next to Network to expand. Once tsclient appears, click on the > next to it to expand. Now you should see a folder icon labeled \\tsclient\X (X will be the drive letter the drive is assigned on your local computer, not the RSS environment). Now you can right click on that folder and map it as a network drive.

Using a CD or DVD:
Due to security settings that may be in place on the local computer, burning to a CD or DVD directly from the RSS environment is currently not supported. However, there is an easy way to still write the backup data to a CD or DVD.
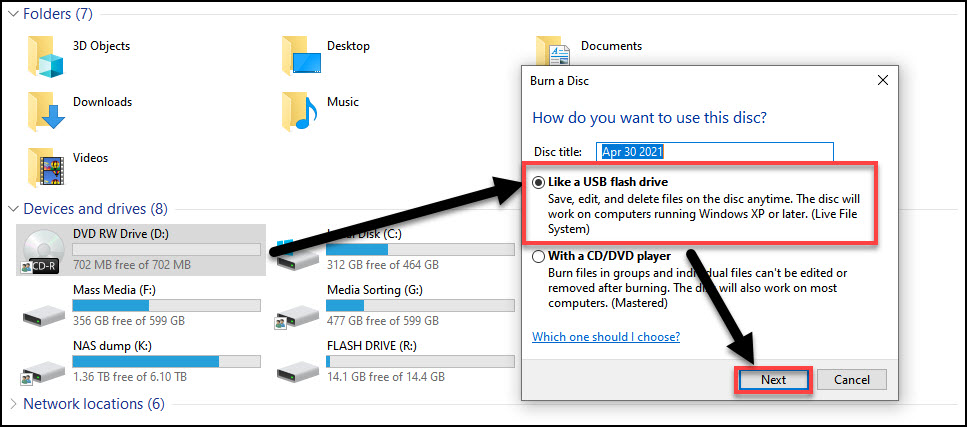
First, the CD or DVD will need to be formatted to be used as a flash drive rather than a standard writable disc. Once you have inserted the disc into your disc drive, open file explorer. Double click on the disc drive (under Devices and drives) and verify that Like a USB flash drive is selected, and then click Next. The disc drive will then format the CD or DVD accordingly.
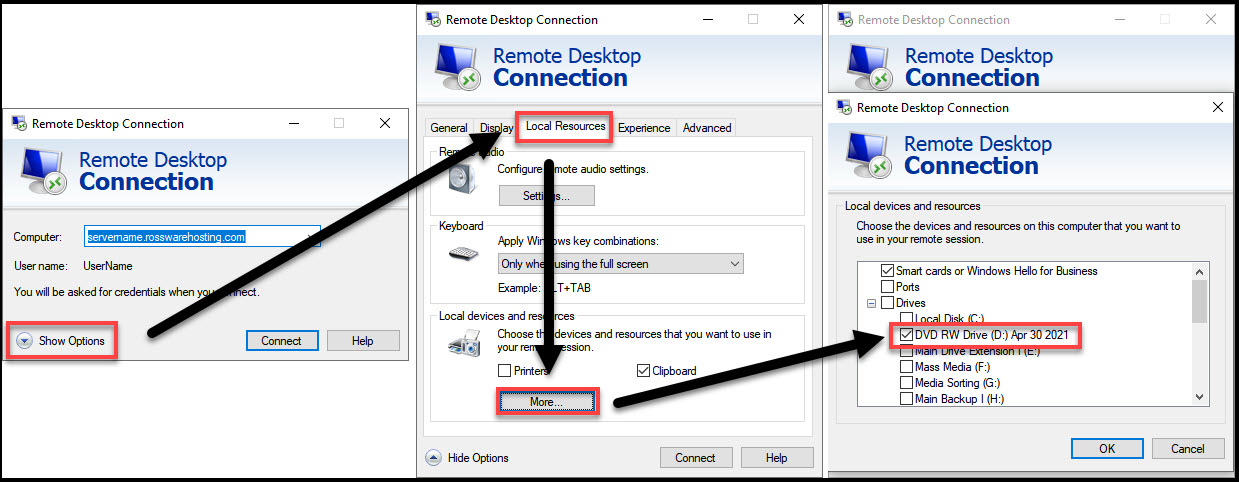
Once the CD or DVD drive has been formatted to be used as a flash drive, we will need to make it available to the RSS server. After opening the Remote Desktop Connection program, and before connecting, click on Show Options (bottom left). Then click on the Local Resources tab, then the More… button under Local devices and resources. When the Local devices and resources window opens, select the proper disc drive. (In most cases, this will be drive D:)
Now when we connect to the RSS server, the formatted CD or DVD, but it will be lacking a local drive letter that is needed by the Rossware backup utility. To assign it a drive letter first open File Explorer. Once File Explorer is open, click on the > next to Network to expand. Once tsclient appears, click on the > next to it to expand. Now you should see a folder icon labeled \tsclient\X (X will be the drive letter the drive is assigned on your local computer, not the RSS environment). Now you can right click on that folder and map it as a network drive.
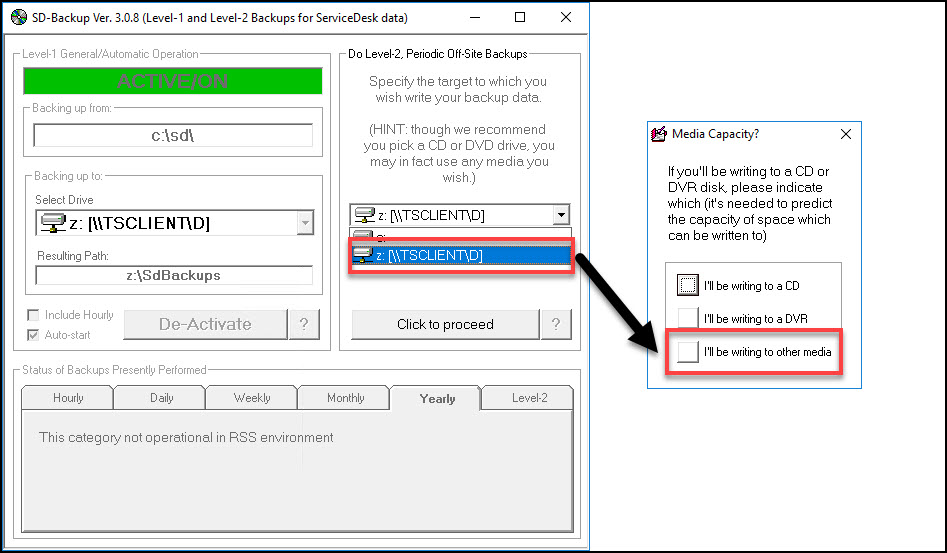
When using the SD backup utility to manually invoke a Level-2 backup, make sure the proper drive (letter) is selected. Once you Click to proceed, you will want to select I’ll be writing to other media.
New functionality in SD Backup Ver. 3.0.9
This new version of the SD Backup utility has a few new features such as; the ability to do hourly backups within the RSS environment, the ability to force Level 1 backups, and the ability to exclude certain subfolders to decrease the time required for Level 2 backups.
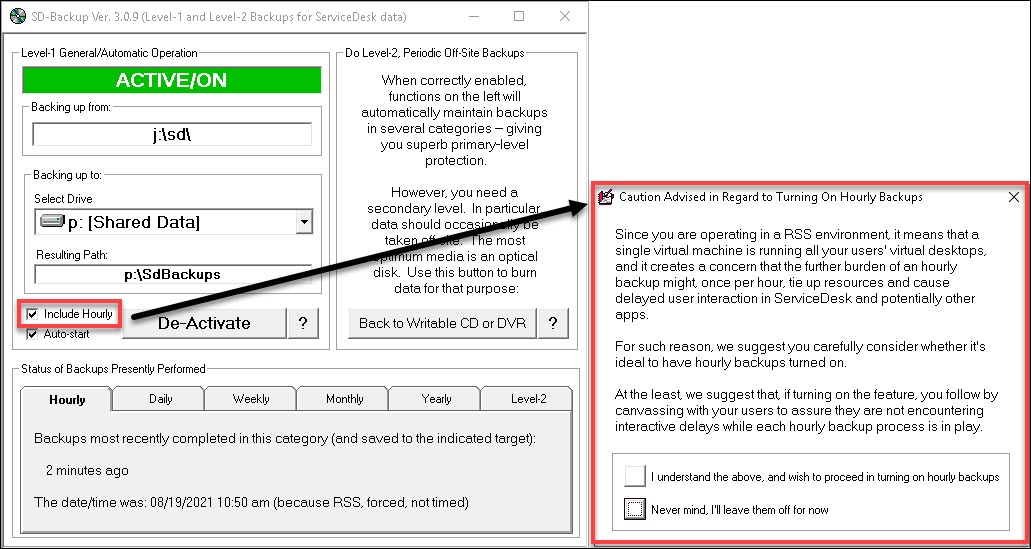
Hourly Backups Within the RSS Environment- In prior versions the option to do hourly backups was omitted for RSS clients. The reasoning was the belief that having the RSS Backup utility ran hourly would cause significant resource usage, and cause a delay in server response time. Please be aware that if you choose this option, you may experience delayed server response time while this operation is being performed.
Forcing Level 1 Backups- Level 1 (Hourly, Daily, Weekly, Monthly, and Yearly) backups can now be forced by right clicking on the desired tab. This give you the ability to force a weekly backup before it is intended to run naturally.
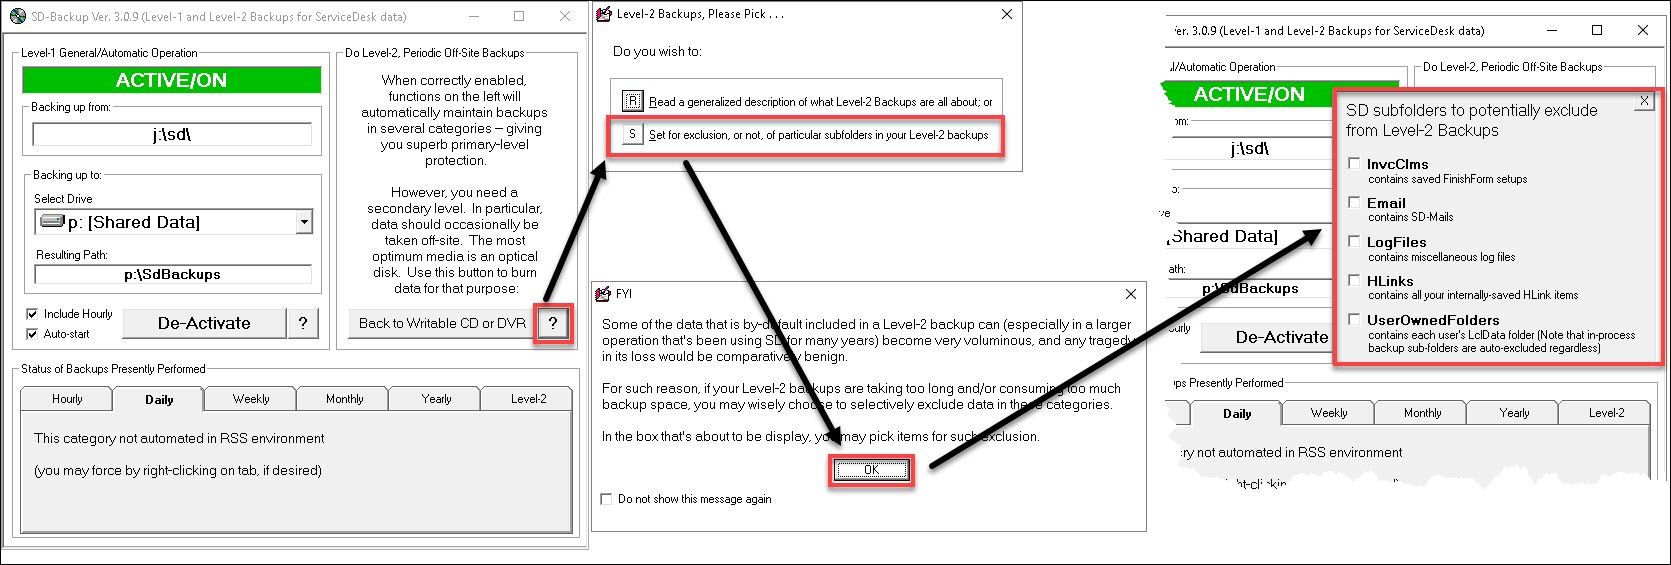
Exclusion of Subfolders During Level 2 Backups- Due to the many layers a Level 2 backup must pass through it has the potential to be a slow process. Especially if the storage device (flash drive or external hard drive) is older, and has slower transfer speeds. There has been reports that a Level 2 back up of a large data size would have taken multiple days, and eventually fail. To overcome this obstacle, SD Backup Ver. 3.0.9 onward has the ability to exclude certain subfolders (that are not detrimental to the operation of ServiceDesk) from the Level 2 backup. To select which subfolders you would like to exclude, click on the [ ? ] next to the button labeled Back to Writable CD or DVR. You will want to select option [S], and then click the [OK] button. You will now be presented with a window that will allow you to choose which subfolders you wish to exclude.
For more information on the SD backup utility, please see the Work Diary below. Work Diary 4-8-215